Getting Started with .NET Report Engine
This article gives you the basic information you need to install and test .NET Report Engine.
Requirements#
Windward .NET Engine Versions 16.0 and later
- .NET Framework 4.6.1 thru 4.8
- Windows Server 2012 R2 or later, Windows 10 or later
- Hardware
- Processor: 1 GHz or faster, 2 GHz recommended
- Memory (RAM): 2.5 GB
- Hard Disk: 300 MB free space
- A .NET Report Engine license key (request a trial license key if you don't have one)
Important
Adding NuGet Package to .NET Framework Project#
Follow these steps to add the WindwardEngine NuGet package to your project:
- Create a new .NET Framework project in Visual Studio, or open your existing project
- Open the Solution Explorer and right click on the solution, then click on "Manage NuGet Packages for Solution"
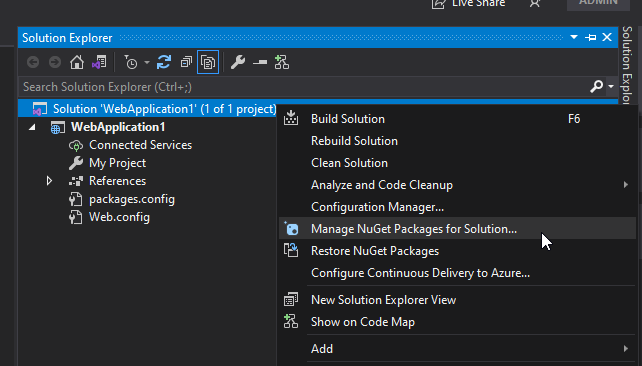
- Then click on browse
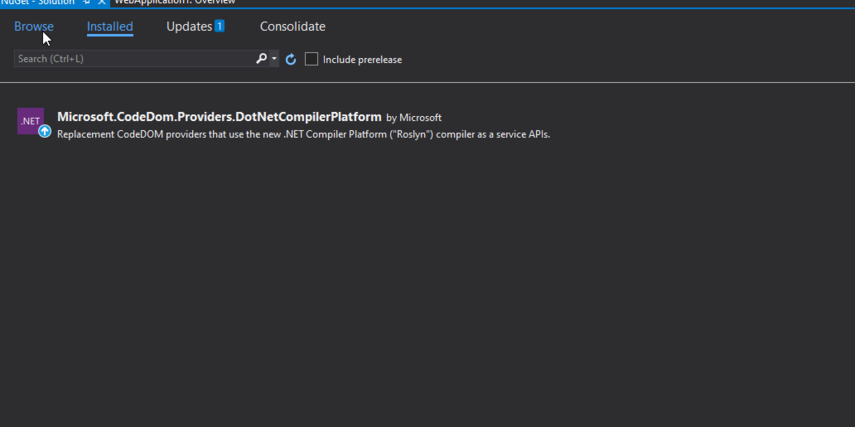 ]
]
- Then search for "WindwardEngine". Click on WindwardEngine, then check the project checkbox
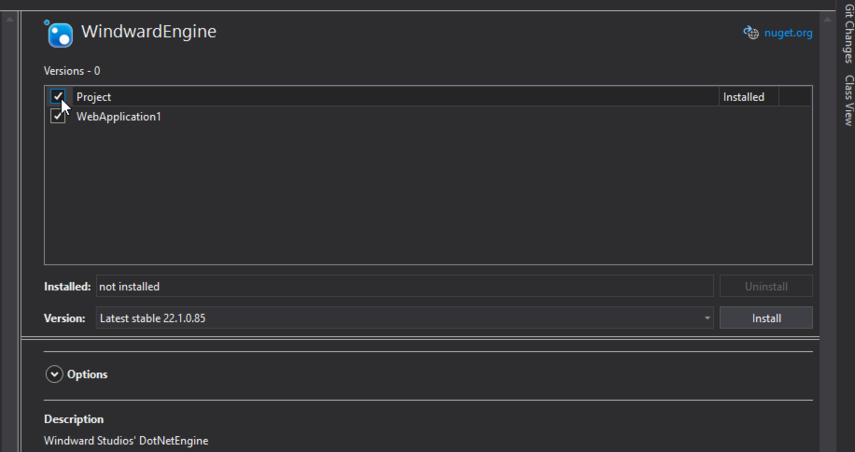
Important
If you couldnt find the WindwardEngine NuGet package when searching for it in the browse window, make sure you set package source to "nuget.org" like in the picture bellow.
- Then click install. You might get a window that says "Preview Changes". Click "OK". The WindwardEngine NuGet project is now added to your solution.
Installing WindwardReports via Zip File#
If you do not want to use NuGet to make use of our reporting engine, we offer the engine, along with all its dependencies as a collection of DLLs in a ZIP file on our website. If you choose to go this route, follow these steps to add the DLLs as references to your .NET Framework project:
- Download the ZIP file from the link above and extract it
- Create a new .NET Framework project in Visual Studio, or open your existing project
- Expand the project in the "Solution Explorer" and right click on "References":
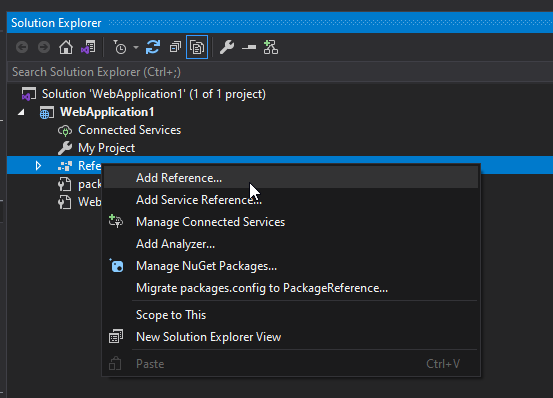
- Then click "Browse"
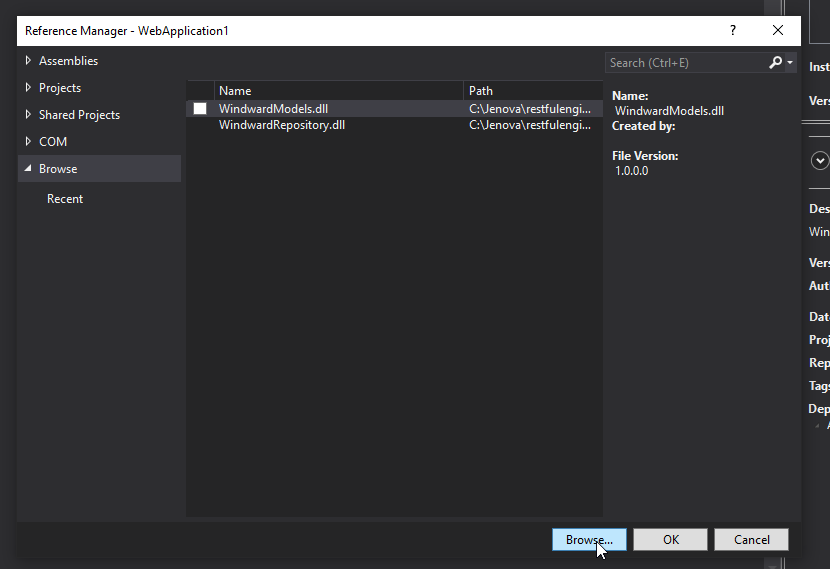
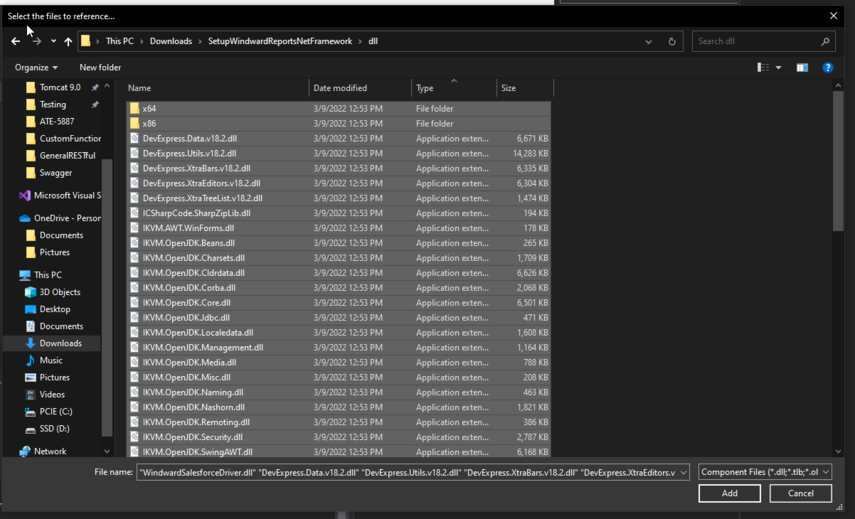
- Browse to the extracted ZIP file, then navigate into the "DLLs" directory. Select all the DLLs, and then click "Add":
- Click "OK"
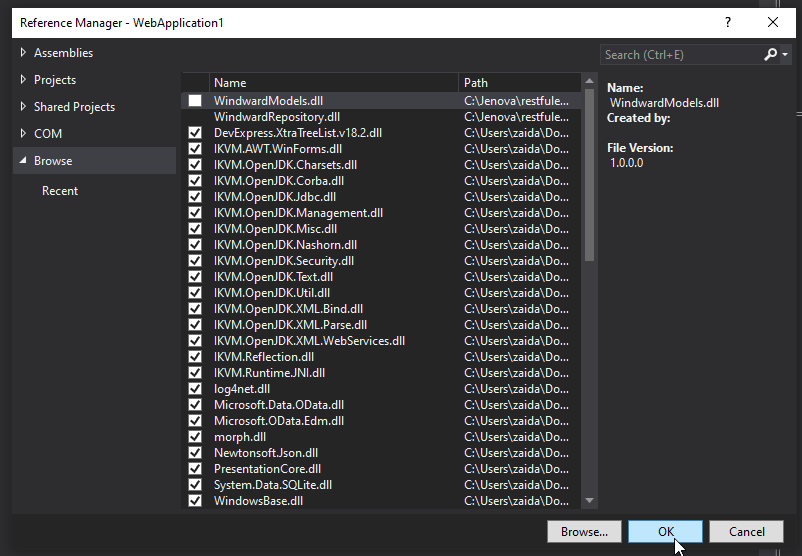
You now have all the references you need to make use of our .NET Report Generation Engine.
Adding WindwardReports to your Config File#
To add your license key or any report properties, you need to add a WindwardReports section to your projects .config file:
To learn more about the different properties we provide for report generation, check out this article.
What's Next#
You should checkout the samples we have on out github that makes use of the WindwardEngine NuGet package.